Leathercraft for Complete Beginners: What It Really Takes
A realistic guide to leathercraft for complete beginners — the skills, starting costs, learning curve, and what to expect from your first projects.
Leathercraft rewards patience far more than talent. If you're willing to slow down and learn the fundamentals, you can produce genuinely useful, durable objects within your first few sessions. But it's also a hobby with a real learning curve, real costs, and a few frustrations that nobody warns you about upfront. This guide covers what leatherworking actually involves, what beginners tend to struggle with, and whether it's likely to suit you.
What Is Leathercraft, Exactly?
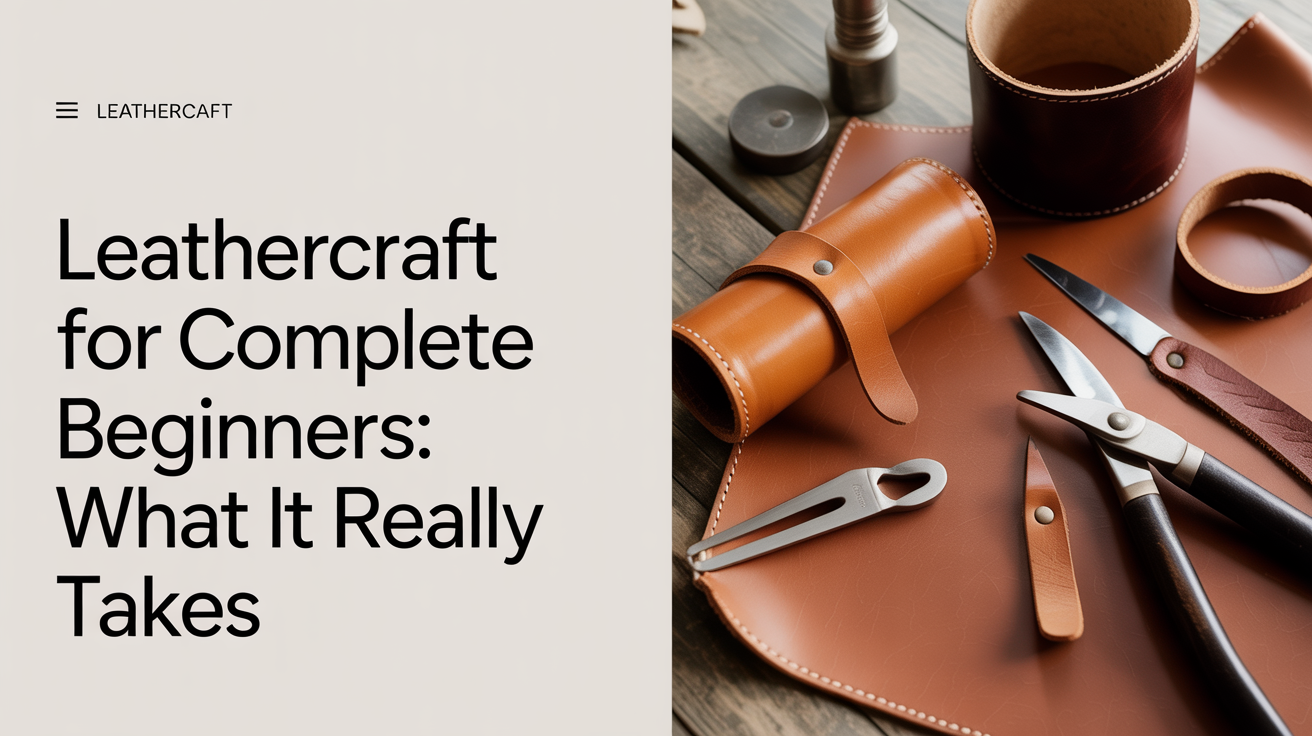
At its core, leathercraft is the process of cutting, shaping, assembling, and finishing pieces of leather to make functional or decorative objects. Wallets, key fobs, belts, bags, sheaths, journal covers, watch straps: the range is enormous. The craft splits roughly into two traditions: tooling and carving (where you wet vegetable-tanned leather and press or carve patterns into it) and clean construction work (where you cut precise pieces and stitch them together).
For most beginners, construction work is the cleaner entry point. You don't need to learn decorative carving to make a wallet. You just need to cut accurately, punch clean holes, glue pieces together before stitching, and finish the edges so they don't look raw.
Those four skills (cutting, gluing, stitching, edge finishing) are the foundation. Everything else builds on top of them.
The Core Skills and How Long They Take to Feel Natural
Cutting is the first thing that surprises people. Leather isn't paper, and a single confident stroke with a sharp knife on a steel ruler gives a cleaner edge than three hesitant passes. A lot of beginners press too hard too soon, which causes the blade to wander. The fix is a very sharp blade (change it more often than you think you need to) and learning to let the weight of the knife do the work. After three or four projects, your cuts will start looking genuinely clean.
Gluing is preparation for stitching, not a replacement for it. You apply contact cement or a leather-specific glue to both pieces, let it tack up, and press them together before punching and stitching. The step people miss: you have to rough up the surfaces first, or the glue peels. That means using a wing divider to scribe a glue line, then sandpaper or a skiver to scratch the surface in that zone. Skip it and your seams separate over time.
Stitching by hand is almost certainly going to look uneven on your first project. Then your second. By the third, you'll have consistent tension and the saddle stitch (where two needles pass through each hole from opposite sides) starts to look deliberate and even. Hand-stitching is not just a substitute for machine stitching: the saddle stitch is mechanically stronger because if one thread breaks, the other holds the seam. A cheap consumer sewing machine can't replicate that, and most aren't designed to handle thick leather without skipping stitches or breaking needles.
Edge finishing is what separates a home-made-looking piece from a professional one. Raw leather edges look rough. Beveling the edge with a tool, then applying an edge finish (gum tragacanth, tokonole, or beeswax) and burnishing it smooth with a piece of dowel transforms the result. It's tedious, which is why beginners often skip it. Don't. A five-minute edge-finishing step changes how the whole piece reads.
Realistic Timeline: What Your First Projects Will Look Like
A simple key fob or luggage tag is a realistic first project. Expect to spend one to two hours on it, not because it's complex, but because you'll re-read instructions, hunt for tools, and probably redo at least one step. The result will be functional but not pristine.
A bifold wallet usually takes a beginner three to five hours across one or two sessions. You'll punch a hole slightly off-center at some point, or your stitching will be uneven on one side. That's normal. The wallet will still work, and you'll see exactly what to fix next time.
A small tote bag or messenger bag is a two- to three-day project once you have basic skills. By then, you'll be making decisions about design rather than just surviving the process.
The learning curve flattens noticeably after about four or five finished projects. Before that, every step feels uncertain. After that, you're refining rather than learning from scratch.
What Leathercraft Actually Costs to Start
This is where honest numbers matter. Here's a realistic beginner setup:
- Starter leather: A small piece of vegetable-tanned leather, 2–3 square feet, from a reputable supplier: $15–30
- Cutting mat: A self-healing mat, A3 size or larger: $15–25
- Craft knife or skiver: $10–20 (replacement blades matter as much as the handle)
- Steel ruler: $8–15 (a plastic one will get nicked and ruin your cuts)
- Pricking iron or stitching chisel: $15–35 (this is where you don't want to cheap out; uneven prongs make uneven holes)
- Two harness needles and waxed thread: $5–15
- Edge beveler: $8–18
- Contact cement or leather glue: $8–15
- Edge finish (tokonole or gum tragacanth): $8–12
- Mallet or maul: $15–30
Total for a basic functional kit: roughly $110–185. You can go lower by sourcing selectively, but cutting corners on the pricking iron or the knife tends to produce frustration rather than savings. See our guide to beginner leatherworking tools and what you can skip for a full breakdown of where to spend and where to save.
Leather itself is an ongoing cost. Vegetable-tanned cowhide is the most beginner-friendly leather for construction work and runs $4–10 per square foot from quality suppliers. Chrome-tanned leather is cheaper and softer but harder to edge-finish cleanly. For your first few projects, buy small pieces rather than a full hide.
Common Frustrations (and How to Push Through Them)
Stitching tension is inconsistent. This is almost universal in the first two to four projects. The cause is usually that you're pulling one needle tighter than the other. Slow down and consciously equalize the tension on each pass. Some people find it helps to anchor the piece in a stitching clamp so both hands are free for the needles.
The knife wanders on cuts. Either the blade is dull (change it) or you're rushing. Leather requires multiple passes for thicker pieces, and the first pass should just score the surface. One deliberate slow pass is almost always better than one fast one.
Pieces don't line up after gluing. You lined them up at the top, then they drifted. Align from a corner, press lightly at first to check position, then apply firm pressure. With contact cement, there's usually no repositioning time once the two surfaces touch, so dry-fit everything first.
Edge finishing looks patchy. Uneven burnishing usually means you applied the finish unevenly or didn't let the first application absorb before adding more. Sand the edge lightly between coats with 400-grit sandpaper, and you'll get a much smoother result.
The honest truth about the learning curve: most beginners want to skip to the interesting part (the stitching, the final object) and underinvest in the prep (clean cuts, good hole placement, proper glue lines). The prep is the work. When the prep is right, the stitching is almost easy.
Is Leatherworking a Good Hobby?
That depends on what you're looking for. Leathercraft rewards slow, methodical work. If you like seeing tangible results you can use or give away, it's deeply satisfying. The materials are honest: leather is a physical thing with grain and variation, and every project reflects the choices you made.
It's not a cheap hobby to start, and it's not fast. But the tools last for years, your skills compound quickly, and a well-made leather object outlasts almost anything you'd buy at a shop. A wallet you made properly will still be in good shape in ten years.
It's also genuinely practical. You can make exactly what you need rather than approximating with what's available. That combination of craft and utility is what keeps most people coming back.
If you want a full walkthrough of where to start, our complete beginner's guide to leathercraft covers the first session in detail. And if you're thinking about your workspace, setting up a small leatherwork bench at home has everything you need to work without a dedicated shop.
FAQ
Do I need a sewing machine to get started with leathercraft?
No. For beginners, a sewing machine is more likely to cause problems than solve them. Consumer machines often can't handle thick leather, and even machines marketed for leather struggle with heavy or double-layered pieces. The saddle stitch by hand is genuinely stronger than a machine lockstitch because both threads are interlocked through every hole. Learn to hand-stitch first. If you later work with thin garment leather at high volume, a machine becomes worth considering.
What type of leather should a complete beginner buy?
Vegetable-tanned cowhide (usually called veg-tan) is the most forgiving leather for learning construction skills. It cuts cleanly, glues well, burnishes nicely, and is available in predictable thicknesses. Most beginner tutorials are designed around it. For small projects like wallets or key fobs, a 2–3 oz weight (roughly 0.8–1.2mm thick) works well for lining pieces, and a 3–4 oz weight suits exterior panels.
How sharp does my knife actually need to be?
Much sharper than you think. A dull craft blade drags through leather instead of slicing, which causes the cut to wander and the edge to compress and look rough. If you're pressing hard, the blade is probably dull. Change blades more frequently than feels necessary (at the start of every project is a reasonable habit) and strop your knife if you're using a fixed blade. Sharp tools are also safer because you apply less force and have better control.
Can I learn leathercraft from online tutorials, or do I need a class?
Online tutorials are a perfectly reasonable starting point, especially for construction work. Video tutorials are particularly useful for understanding stitching rhythm and edge burnishing technique. A class can be valuable if you want hands-on feedback on your cuts and stitching tension, but it's not required. Many experienced leatherworkers are entirely self-taught. The main advantage of a class is catching bad habits early, something that otherwise takes a few extra projects to figure out on your own.
What's the most common mistake beginners make?
Skipping the prep work. Clean, consistent stitch holes require accurate marking with a wing divider and a pricking iron used at a consistent angle. Most beginners rush this step, punch their holes freehand or at varying angles, and then wonder why the finished stitching looks uneven. Slow prep work is the difference between a piece that looks deliberate and one that looks like a first attempt, even when the stitching itself is technically fine.