How to Set Up a Small Leatherwork Bench at Home
A practical guide to leatherwork bench setup for beginners: surfaces, lighting, tool storage, ventilation, and making it work in any space.
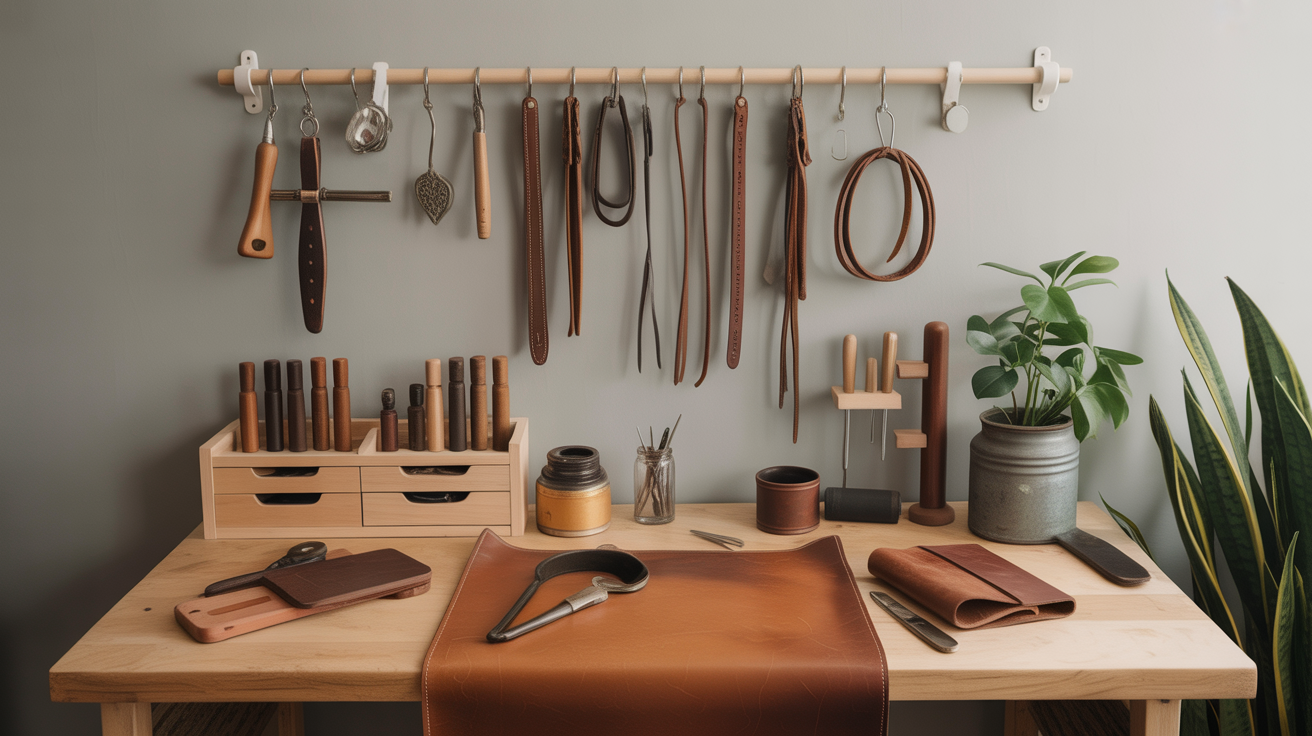
A dedicated leatherwork bench makes the craft significantly easier and safer: you stop hunting for tools mid-stitch, your cutting mat stays put, and you protect whatever surface you're working on. You don't need a garage workshop. A corner of a spare room, or even one end of a sturdy kitchen table set up deliberately, is enough to get started.
Choose the Right Work Surface
The single most important variable in a leatherwork bench setup is a solid, heavy, non-flexing table. Leather chiseling and mallet work drives vibration straight through flimsy particleboard; the punches skip or won't seat cleanly. A solid-wood workbench, an old dining table with thick legs, or a butcher-block-top table all work well. Minimum recommended surface height is counter height (about 34–36 inches) so you can stand or sit on a tall stool and work with your arms in a comfortable punching position.
If you're outfitting a small apartment or working at a kitchen table you don't want to damage, a 24×36-inch piece of 3/4-inch MDF or plywood placed on top gives you a sacrificial layer that's easy to replace.
Two Surfaces, Not One
Leathercraft actually calls for two distinct working sub-surfaces:
Cutting and punching surface: A poly cutting mat (HDPE or similar food-grade plastic) absorbs chisel and awl tips without destroying them. A self-healing mat works for utility knife cuts but compresses under a mallet strike and can make pricking-iron holes less clean. For a bench you'll use regularly, a 12×18-inch HDPE cutting board (the white kind sold for kitchen use) is cheap, durable, and re-flattenable with a plane or sandpaper once it gets too scored.
Stamping and embossing surface: Leather stamps and carving tools need a firm, dead-weight base to transfer the impression cleanly. A granite or marble tile (12×12-inch "remnant" pieces from a tile shop cost very little) placed under your leather absorbs the mallet's energy and prevents the table from bouncing. It also doesn't compress. Keep one near your cutting board; swap them depending on the task.
Lighting and Magnification
Punching holes on a pre-marked stitch line is harder than it looks in dim light. Good overhead lighting plus a dedicated task lamp aimed at a low angle across the leather surface will show you surface texture, punch spacing, and skive edges clearly. Low-angle light creates a shadow across any raised line or groove, which makes guiding a swivel knife much more accurate.
A simple LED desk lamp positioned to the left (if you're right-handed) is all you need. If you're doing fine hand-stitching or embossing, a lighted magnifier on a swing arm costs about $25 and reduces eye strain considerably.
Tool Storage
Leathercraft tools multiply fast. A few months in, you'll have six or eight pricking irons, multiple awls, several edge bevelers, and a growing set of stamps. Building storage into your bench from the start saves a lot of table-clearing frustration.
Options that work in a small space:
- Wall-mounted tool rack: A strip of scrap wood with 1/4-inch dowels angled forward holds chisels, awls, and punches handle-up so you can see them at a glance. Mount it at eye level behind the bench.
- Magnetic tool strip: The same type sold for kitchen knives holds metal-handled tools securely and takes up zero bench space. Good for scissors, edge bevelers, and wing dividers.
- Pegboard panel: A 2×4-foot pegboard square attached to a wall or to a freestanding frame gives flexible hook arrangements for handles, clamps, and coiled threads.
- Divided tray or drawer: Small punches, grommets, rivets, and hardware stay accessible in a shallow tray with compartments. A bamboo desk organizer or a craft store tray works.
- Mason jars on a shelf: For thread spools, dye bottles (closed), and conditioners. Cheap and transparent so you know what's running low.
The general principle: keep the tools you use every single time (awl, mallet, pricking iron, wing divider) within arm's reach of your dominant hand. Everything else can live on the wall or in a drawer.
The Stitching Pony
A stitching pony (also called a stitching horse or clamp) holds your workpiece upright so both hands are free to run the two-needle saddle stitch. Without one, you're clamping the leather between your knees or using binder clips, which works but slows you down and produces uneven stitch tension.
A basic stitching pony clamps to the edge of a table and takes up no permanent footprint. More serious benchtop versions stand on their own legs and hold the work at a fixed angle. For a small leather workshop at home, the clamp-on version is ideal: it stores on a hook when not in use. You can also build a simple version from two pieces of hardwood and a carriage bolt; it's a common beginner woodworking project and costs about $8 in hardware.
Position the clamp so the work sits at chest height when you're seated, with the stitch line at eye level. That posture keeps your stitching consistent over a long session.
Ventilation and Chemical Safety
Leathercraft involves three categories of products that need airflow: dyes (alcohol- or water-based), contact cement/rubber cement (highly flammable solvent-based adhesives), and finish coats (resolene, acrylic finish, beeswax). Most are low-risk with normal precautions, but contact cement specifically produces vapors that accumulate quickly in an unventilated room.
Minimum ventilation setup:
- Open a window directly across from you, not just nearby
- Add a small box fan pushing air outward to create cross-ventilation
- Work in short sessions with breaks if ventilation is limited
- Never use solvent cement near an open flame or while smoking
Safe solvent storage matters as much as ventilation during use. Keep contact cement, daubers, and solvents in a metal or fireproof storage box (available inexpensively at hardware stores) when not in use. Don't leave open dye bottles or cement cans on the bench overnight. Label everything clearly.
Water-based contact cement is a lower-fume alternative to classic solvent cement and works well for most beginner projects. If you're in a very small apartment with limited airflow, switching to water-based adhesive removes most of the ventilation concern.
Protecting Your Table
If you're working on a kitchen table or a surface you care about:
- Use a silicone mat or cutting board under dye bottles and finish applicators to catch drips
- Alcohol dye will stain most surfaces permanently, so keep a paper towel under your dauber and wipe up any spills immediately
- Put rubber feet or felt pads under your cutting board and granite slab so they don't scratch
Minimum Footprint Checklist
Here's what a functional beginner's leatherwork bench actually requires, stripped down to essentials:
Surface and sub-surfaces
- Sturdy table or workbench (no flex under mallet strikes)
- HDPE cutting board, 12×18 inches minimum
- 12×12-inch granite or marble tile for stamping
Lighting
- Overhead light + adjustable task lamp at low angle
Tool storage
- Wall strip or pegboard for handles and chisels
- Shallow divided tray for small hardware and punches
- Shelf or container for thread, dyes, and finishes
Work holding
- Stitching pony (clamp-on type for small spaces)
Ventilation and safety
- Openable window + fan for cross-ventilation
- Metal or fireproof storage box for solvents and cement
- Nitrile gloves, eye protection near dyes
Protection
- Silicone mat or scrap board under chemical bottles
- Dust sheet or drop cloth if working near furniture you want to protect
The entire physical footprint (bench space occupied while working) can be as small as 24×36 inches. The key is vertical storage: get the tools off the table and onto the wall.
Starting Small and Scaling Up
Most beginners start at a kitchen table with a $4 cutting board and a piece of granite tile from a thrift store, and that setup is legitimately fine for the first six months. Before spending on a dedicated bench, check out what tools you actually need to start and what leathercraft really demands of a beginner. You may find the existing setup works longer than expected.
When you do invest in a dedicated workspace, the upgrades that matter most are: a heavier table (reduces chisel bounce), better lighting (reduces eye strain and punch errors), and a proper stitching pony (speeds up every hand-stitched project). Everything else (fancy tool chests, custom-built benches) is incremental.
The complete beginner's guide to starting leathercraft walks through the full arc from first project through tool accumulation, which maps directly onto how your workspace will naturally grow over time.
FAQ
Can I do leathercraft on a regular kitchen table?
Yes, with some protection in place. A piece of 3/4-inch MDF or a thick cutting board on top takes the impact from mallet strikes and prevents scuffing. The bigger risk is dye and cement spills, which stain permanently. Keep a silicone mat under any open chemical containers and work directly on the board, not the table surface.
What size work surface do I actually need?
A working area of about 18×24 inches accommodates most beginner projects (wallets, belts, small bags). Add space on either side for your cutting board, tools, and a container of water if you're carving. A 2×4-foot total bench area is practical minimum; 2×6 feet gives you comfortable room to spread out.
Do I need a dedicated room for leathercraft?
No. A corner of a spare room, one end of a garage, or even a rolling cart that stores away between sessions can work well. The main constraint is ventilation when you're using cement or dye, so a space with an openable window is more important than a dedicated room.
How do I store leather to keep it in good condition?
Roll hides loosely or store them flat in a dry area away from direct sunlight and heat. Don't fold leather along the grain lines. For cut pieces and project leather, a flat storage bin or a portfolio-style folder keeps them protected. Avoid storing leather in sealed plastic bags for extended periods, as it needs a little airflow to stay supple.
Is a stitching pony worth buying before I know if I'll stick with the hobby?
A clamp-on stitching pony costs $20–40 and meaningfully improves stitch quality and speed. If you're on the fence, make a simple one from two hardwood scraps and a bolt; it works the same way. The real value isn't apparent until your first project with consistent stitch tension; most beginners who try one don't go back to free-holding.