How to Make a Leather Coaster Set
Learn how to make leather coasters at home with basic tools. This beginner guide covers materials, cutting, edge finishing, and a simple leather coaster patt...
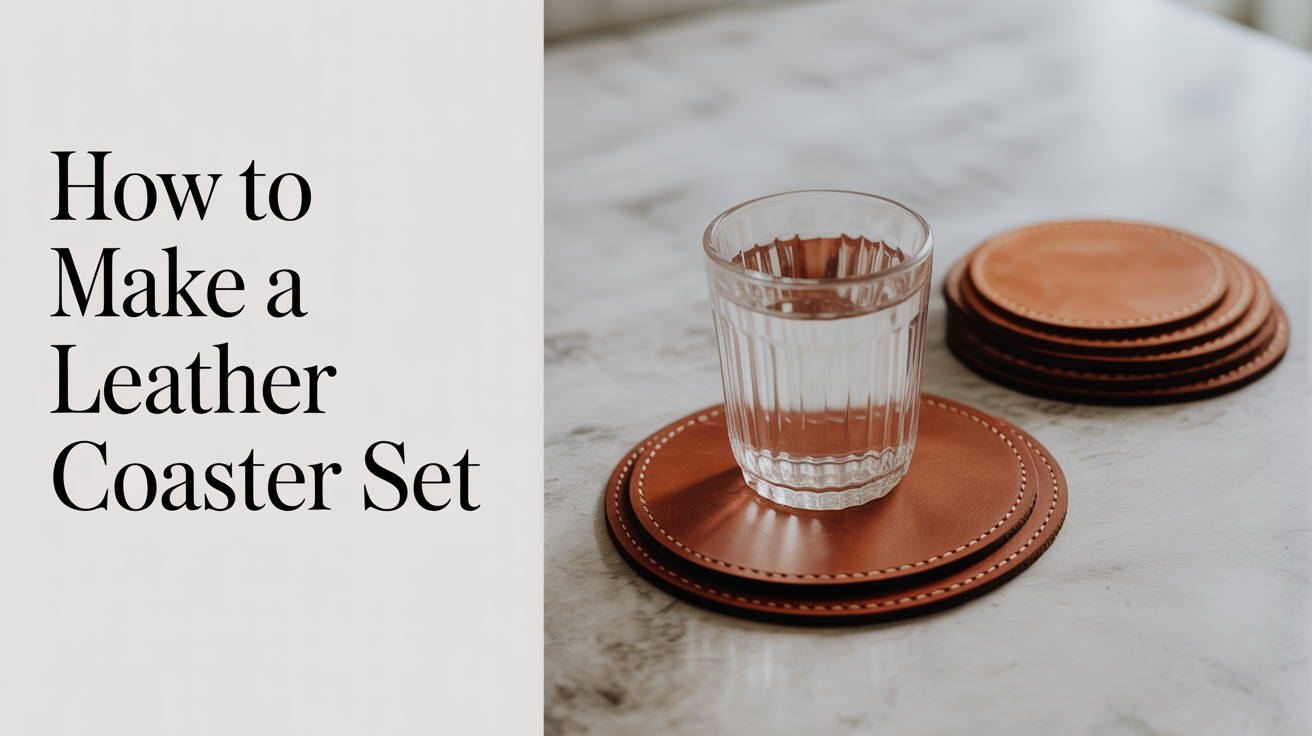
A set of round leather coasters is one of the best first projects in leathercraft. The pieces are small, the cuts are forgiving, and you end up with something genuinely useful. Most beginners finish a set of four in an afternoon.
Here is the short answer: cut circles from 3-4 oz vegetable-tanned leather, punch a small center hole for your compass, bevel and burnish the edges, and apply a light coat of finish. No stitching required. No special carving. Just clean cuts and smooth edges.
What You Need
You do not need much for this project. Keep the list short on purpose so you can test the process before buying more.
Leather Use 3-4 oz vegetable-tanned leather (about 1.2-1.6 mm thick). This weight sits flat, accepts edge burnishing well, and will develop a patina over time. A small scrap piece around 30 x 30 cm is plenty for four coasters. Avoid chrome-tanned leather for this project; the edges fray rather than burnish smooth.
Tools
- Swivel knife or rotary cutter (or a sharp utility knife)
- Wing divider or compass for marking circles
- Cutting mat or marble slab
- Edge beveler (size 1 or 2)
- Bone folder or wood slicker for burnishing
- Small sponge or dauber
- Toby pen or wing divider for scoring a border line (optional)
Supplies
- Gum tragacanth or beeswax-based edge finish (Tokonole works well)
- Neatsfoot oil or conditioner
- Sandpaper, 220 grit and 400 grit
- Water in a small cup
Practice your circle cuts on cheap card stock before touching the leather. A shaky cut on a 10 cm circle is obvious.
The Leather Coaster Pattern
The most common size for round leather coasters is 10 cm (about 4 inches) in diameter. That fits a standard mug or pint glass without looking oversized. You can scale up to 11-12 cm if you prefer.
Marking the circles
Set your compass to 5 cm (half the diameter). Press the point into the leather at the center of your first coaster location and draw a full circle. The pinhole left behind is small and will be hidden in use.
Arrange four circles on your piece before cutting any of them. Leave at least 1.5 cm between circles so your knife has room to complete each cut cleanly.
Spacing on the hide
| Coaster count | Minimum leather piece |
|---|---|
| 4 | 25 x 13 cm |
| 6 | 35 x 13 cm |
| 8 | 35 x 25 cm |
These are tight arrangements. Add a couple of centimeters on each side if you prefer more room to work.
Cutting Round Leather Coasters
Cutting clean curves is the part that takes the most practice. A few things help.
Keep the knife vertical. Tilting the blade even slightly creates a beveled cut edge that looks uneven after finishing. Let the weight of your hand guide the knife rather than pushing hard.
Cut in one continuous pass. Stopping mid-circle and restarting almost always leaves a small notch where the cuts meet. Pull the leather toward you slowly while rotating the piece, or rotate the cutting mat underneath.
Go slightly outside the line, then trim. On your first few attempts, cut 1-2 mm outside the marked circle, then come back and trim to the line. This is slower but forgiving.
A swivel knife makes curves easier than a straight blade because the tip rotates as you pull. A rotary cutter with a heavy mat also works well. Whatever you use, test it on a scrap piece of the same leather first.
Edge Finishing the Coasters
Clean edges separate a handmade coaster from a rough cut-out. Budget the same amount of time for edge work as you do for cutting.
Step 1: Sand the edge Work through 220 grit first, then 400 grit. Sand the very top and bottom corners and the side wall of the edge. Keep the sandpaper flat against the edge so you are not rounding the face of the leather.
Step 2: Bevel the top and bottom Run a size 1 or size 2 edge beveler around both the top face and the bottom face of each coaster. This removes the sharp 90-degree corner and gives the finish something to grip. Two passes on each side is usually enough.
Step 3: Apply edge finish Dampen the edge very lightly with water, then apply a small amount of gum tragacanth or Tokonole to the edge with your finger or a dauber. Wait about 20 seconds for it to soak in slightly.
Step 4: Burnish Rub the bone folder or wood slicker back and forth along the edge with firm, even pressure. You will feel the edge tighten and see a slight sheen develop. Keep going until the edge looks and feels smooth. This usually takes 30-60 seconds per coaster edge.
Repeat steps 3 and 4 once more for a cleaner finish.
Conditioning and Final Finish
After the edges are done, apply a thin coat of neatsfoot oil or leather conditioner to both faces of each coaster. This replenishes any moisture lost during cutting and burnishing and gives the leather a richer color.
Let it sit for 20-30 minutes, then wipe off any excess with a clean cloth.
Optional: add a non-slip backing
A thin cork sheet or self-adhesive felt pad cut to the same size and glued to the bottom of each coaster stops them sliding on smooth surfaces. Use a contact cement applied to both pieces, let it become tacky (about 5 minutes), then press firmly. Let it cure overnight before use.
Optional: score a decorative border
Use a wing divider set to 5 mm to score a light line parallel to the edge on the top face. This adds a clean visual frame without any carving or tooling. Run the divider firmly enough to leave an impression but not cut through.
Building on This Project
Once you are comfortable with small leather pieces, the same cutting and edge-finishing skills apply directly to more involved projects. A leather card holder uses the same edge bevel-and-burnish approach on flat panels, and a simple leather wallet introduces stitching on a similarly flat piece. If you want to practice cutting longer straight lines, making a leather belt from scratch is a good next step.
Frequently Asked Questions
What weight of leather works best for coasters? 3-4 oz vegetable-tanned leather is the standard starting point. It sits flat without curling, takes edge burnishing cleanly, and is thick enough to absorb condensation without going soft. Lighter weights tend to curl at the edges over time. Heavier weights (5-6 oz) also work but are harder to cut in curves.
Do I need a die punch to get perfect circles? No. A sharp knife and a compass get you very close. Steel circle cutting dies exist and cut coasters in a single press, but they are expensive and not worth buying for an occasional project. Practice with a knife on cardstock until your freehand circles are consistent.
How do I prevent the coasters from warping after use? Vegetable-tanned leather absorbs moisture from condensation and can warp if it dries unevenly. A light coat of neatsfoot oil before first use helps. After the coasters get wet, stack them flat under a heavy book while they dry. They will flatten back out.
Can I stamp or tool the top surface? Yes. Tooling works well on this project because the pieces are small and easy to hold flat on a marble slab. Case the leather (dampen it until it darkens slightly, then let it come back to a medium tan), do your stamping or carving, let it dry completely, then move on to edge finishing. Tooling before edge work is the right sequence.
What finish stops the coasters from staining furniture? A thin coat of Resolene or a paste wax after the oil coat adds a light water barrier. Nothing makes leather fully waterproof, but a sealed surface wipes clean more easily. Apply with a dauber, buff with a soft cloth, and let it cure for several hours before use.