How to Make a Basketweave Stamp Pattern
Learn basketweave leather stamping step by step, tools, prep, and stamping sequence for clean geometric results on your first try.
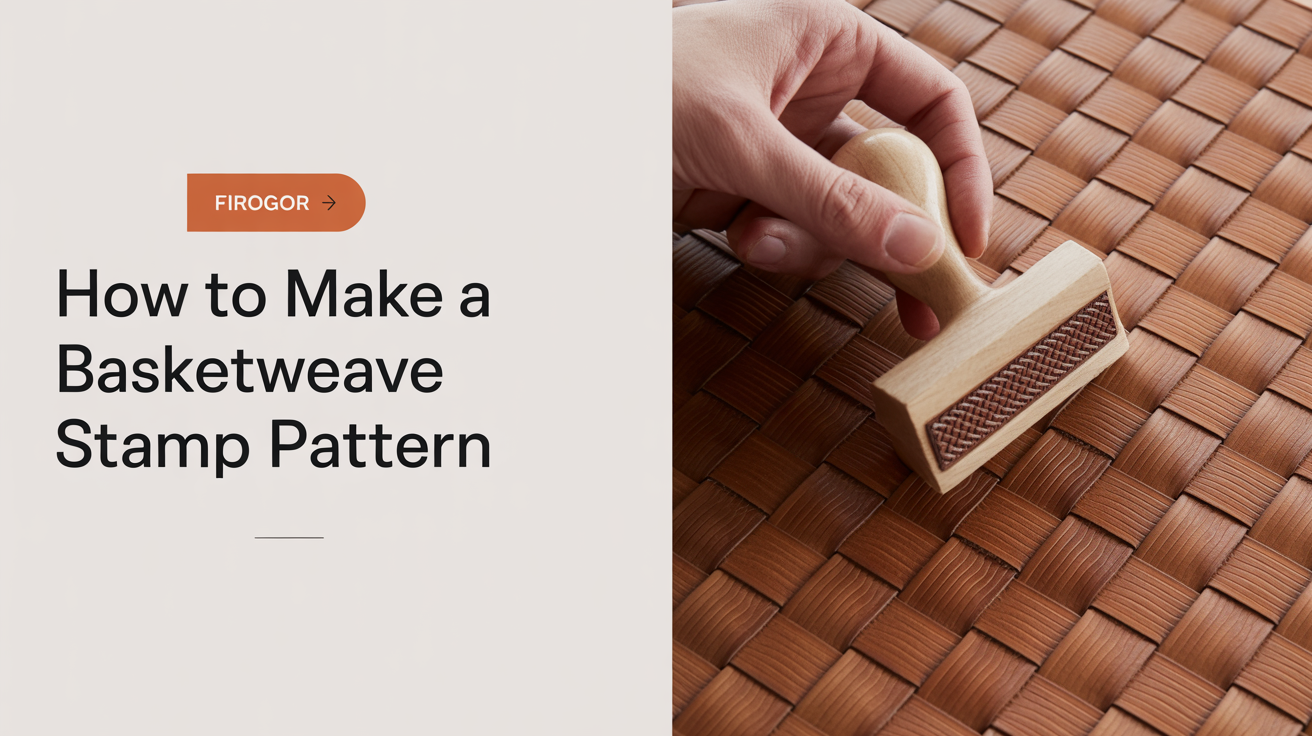
The basketweave is one of the most recognizable patterns in leather tooling. Rows of interlocking rectangular impressions create the illusion of woven strips crossing over and under each other. The result looks complicated, but the stamping motion is repetitive and forgiving once you understand the grid underneath it.
Here is the short answer: you need a basketweave stamp (most commonly a B197 or similar "thumb print" tool), cased leather, and a careful sequence of offset rows. The pattern is built stamp by stamp, not drawn first, so the geometry emerges from consistent spacing.
What You Need Before You Start
You do not need many tools for a basketweave. Keep the list focused.
Stamps:
- One basketweave stamp in the size that suits your project. A B197 is a common beginner choice because the oval shape works well for most belt and wallet scales.
- A small mallet or maul (rawhide or poly, not metal)
Surface and hide:
- Vegetable-tanned tooling leather, 3-4 oz for small projects, 4-5 oz for belts
- A granite or marble slab or a hard rubber mat as a stamping base
- A swivel knife is optional for a plain basketweave, but useful if you want to outline the pattern
Prep tools:
- A damp sponge or wool dauber
- A ruler and wing dividers or a scratch compass
Safety note: Casing leather involves water, and stamping creates force. Keep fingers clear of the stamp face and use a proper mallet rather than improvising with household objects that can slip.
Casing the Leather Correctly
Basketweave stamping only works on leather that has been cased to the right moisture level. Wet leather that is too saturated will close over after the stamp lifts, losing definition. Leather that is too dry resists the impression and damages the fibers.
To case leather:
- Submerge the piece in clean water for 10-15 seconds (thicker hides may need a few more seconds).
- Set it flesh side down on a clean surface and wait until the surface changes from a dark, wet color back to the natural tan. This usually takes 5-20 minutes depending on thickness and humidity.
- Press lightly with a fingertip. You want a faint mark that springs back slowly. That is the working window.
Because basketweave takes time to stamp, case a smaller area first and case additional sections as you go. You will develop a feel for your workspace humidity.
For more detail on reading the moisture cues, see the full walkthrough at how to wet-case leather for tooling.
Understanding the Grid
The basketweave pattern is a diagonal grid, not a straight one. Every row is offset by half a stamp length so the "over" impressions on one row align with the "under" impressions on the next.
Before you stamp, mark the grid lightly:
- Draw a baseline 3-4 mm from the edge of your design area.
- Set your wing dividers to the width of your stamp face (not the full tool, just the imprint face).
- Walk the dividers along the baseline to mark evenly spaced columns.
- Now shift those marks by half a stamp width for the second row and every even-numbered row.
You do not need to mark every row in advance. Many crafters mark just the first two rows, then use the preceding row as a visual reference to keep the offset consistent.
Keeping rows parallel and maintaining the offset is what separates a sharp basketweave from a muddled one. Work slowly at first.
Stamping the Pattern Row by Row
This is where the geometry comes together. The stamp has a slight oval or rounded rectangular face. Each impression goes down with the tool held at a consistent angle so the "hinge" (the slightly raised ridge on one side of many basketweave stamps) creates the visual break between the over and under strips.
Row 1:
- Place the stamp at the left edge of your first row.
- Hold the mallet lightly above the stamp and strike with one firm, even tap. Do not rock the stamp or double-strike.
- Move to the next marked position and repeat across the row.
Row 2:
- Offset by half a stamp width.
- Rotate the stamp 90 degrees from the previous row's orientation.
- Align the top edge of row 2 stamps so they just touch or barely overlap the bottom edge of row 1.
- Strike and move across.
Every subsequent row: alternate between the row 1 orientation and the row 2 orientation, keeping the offset consistent.
The overlap between rows creates the woven illusion. Too much gap between rows and the leather in between will remain unstamped and the weave effect disappears. Too much overlap and the rows pile up and blur.
Test your spacing and pressure on a scrap piece of the same leather before working on your actual project. See how to tool leather: a beginner's guide to stamping for general stamping mechanics that apply here.
Finishing the Edges of the Pattern
The edges of a basketweave area are rarely perfectly clean because a full stamp impression may go past the design boundary. There are two approaches:
Border line first: Use a swivel knife to cut a clean border around the design area before stamping. Stamp right up to but not over that cut. The knife line creates a visual frame that makes partial edge stamps look intentional.
Beveling after: If you have partial stamps at the edges, use a small beveler (like a B200 or B203) to press the edge impressions down and blend them into a clean transition.
For corner areas, some crafters miter the pattern by angling the final row inward. This takes practice. For a first project, a simple beveled border is the cleaner solution.
Once you are satisfied with the pattern, let the piece dry fully (flesh side up works well to keep the surface from sticking to your mat), then apply a finish or antique to bring out the depth of the impressions. Fiebings Tan-Kote or a light coat of neatsfoot oil are common starting choices before dyeing.
Stamping Tools Reference
| Tool | Common Designation | Use in Basketweave |
|---|---|---|
| Basketweave stamp | B197, B198, B200 | The main pattern stamp |
| Mallet or maul | Rawhide or poly, 8-12 oz | Driving the stamp |
| Beveler | B200, B203 | Cleaning edge impressions |
| Swivel knife | Any beginner model | Cutting design border (optional) |
| Wing dividers | Adjustable type | Marking grid spacing |
See beginner leather stamping tools and how to use them for guidance on choosing and conditioning a stamp before its first use.
Frequently Asked Questions
What leather weight works best for basketweave stamping? Vegetable-tanned leather in the 4-5 oz range is a reliable starting point. Thinner leather (2-3 oz) tends to compress unevenly and may warp from casing. Thicker hides (6+ oz) hold crisp impressions but require more mallet force and are harder to case evenly.
How hard should I hit the stamp? One firm, controlled tap is usually enough on properly cased leather. If the impression is shallow, the leather may be too dry rather than the strike being too soft. Re-case a slightly dry area with a barely damp sponge before hitting harder.
My rows are drifting out of alignment. What went wrong? The most common cause is not re-marking the offset correctly after the first two rows. Use a ruler to check your alignment every 3-4 rows, not just at the start. A slight drift becomes very visible after 6-8 rows.
Can I stamp a basketweave on chrome-tanned leather? No. Chrome-tanned leather does not hold tooling impressions. It is not vegetable tanned, so moisture from casing will not firm the fibers the way tooling requires. Stick to vegetable-tanned or combination-tanned leather for any tooling work.
Do I need to outline the design before stamping? Not for a plain basketweave. The pattern is purely a texture, not a pictorial design, so there is no need to transfer a drawing onto the leather first. A beveled border or swivel knife frame is optional and mainly serves to give the pattern a clean edge rather than tapering off into unstamped leather.