How to Carve Leather with a Swivel Knife
Learn how to use a swivel knife for leather carving: parts, grip, blade depth, casing leather, and making clean decorative cuts.
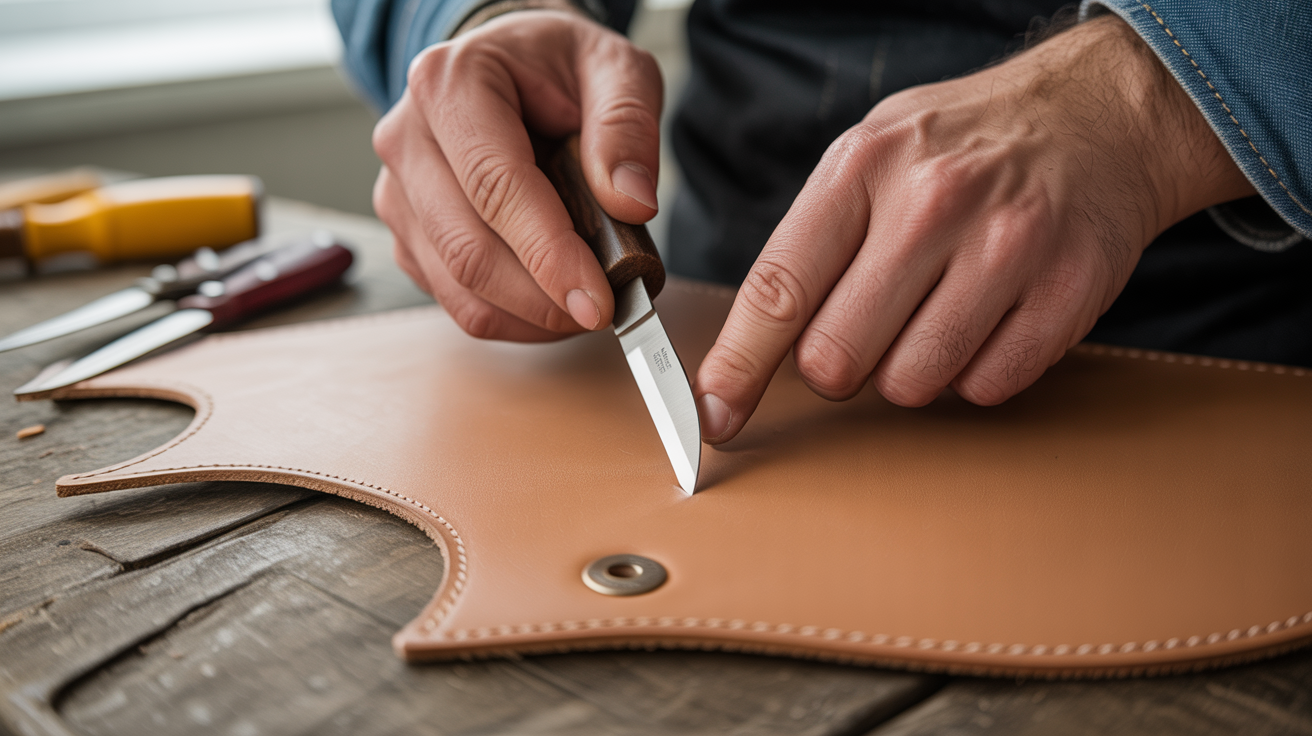
A swivel knife is the first tool you reach for in decorative leatherwork. It cuts the design lines into cased vegetable-tanned leather before you stamp or bevel, and once you understand how it moves, you'll find it surprisingly intuitive to control.
Parts of a Swivel Knife
Before you can use a tool well, you need to know what you're holding. A swivel knife has three main parts:
- Barrel: the cylindrical body you grip between your thumb and middle finger. Because it rotates freely, the blade can follow a curve without you moving your wrist.
- Yoke: the flat saddle-shaped fitting on top of the barrel. Your index finger rests here to apply downward pressure and steer the blade.
- Blade: the angled cutting edge that sits at the bottom of the yoke assembly. Blades come in different widths; a medium or standard blade is the right starting point for beginners.
Some knives also have a ceramic or Teflon bushing inside the barrel to keep the rotation smooth. If yours feels stiff, a drop of oil on the spindle helps.
Choosing and Preparing Your Leather
Swivel knife carving only works on vegetable-tanned leather that has been properly cased (dampened). Chrome-tanned leather and suede won't hold tooling impressions.
See how to wet-case leather for tooling for the full process, but the short version: sponge clean water onto the flesh side of the leather, let it absorb for a minute, then flip and sponge the grain side lightly. When the leather returns to its natural tan color from the wet dark look, it's ready. Too wet and the blade will drag and tear; too dry and it won't cut cleanly.
Thickness matters too. Vegetable-tanned tooling leather in the 8–10 oz range (about 3.2–4 mm) gives you enough depth to carve without cutting through. Thinner stock in the 4–6 oz range works for smaller designs but demands a lighter touch.
How to Hold a Swivel Knife
Grip is everything. An incorrect grip makes the blade skip or wobble; the correct grip feels effortless after an hour of practice.
- Seat your index finger in the yoke. The padded part of your finger, not the tip, sits flat in the saddle. This finger controls the pressure going into the leather.
- Pinch the barrel between your thumb and middle finger. Your thumb goes on one side, your middle finger on the other. These two fingers rotate the barrel to steer curves.
- Let your ring and pinky fingers trail on the leather surface. They act as a stabilizer, keeping the knife from tipping side to side.
- Keep your wrist relaxed. The swivel action handles the steering; you don't pivot your wrist the way you would with a fixed-blade knife.
The knife should lean slightly toward you (about 45 degrees from vertical) as you pull it. If you push, the blade tends to lift and skip. Always pull toward your body along the design line.
Blade Height and Sharpness
Setting Blade Depth
The blade should protrude just enough to cut roughly half the thickness of your leather — never all the way through. If you're working 4 mm leather, aim for a 1.5–2 mm cut depth.
Most swivel knives have a locking screw on the yoke assembly. To adjust:
- Loosen the screw.
- Slide the blade up or down in small increments.
- Test on a scrap piece; the blade should leave a clean V-groove without the leather flopping apart or feeling spongy underfoot.
- Tighten the screw once you have the right depth.
A blade set too high digs into the marble or glass work surface below; too low and your stamps will have nothing to follow.
Keeping the Blade Sharp
A dull swivel knife is the single biggest reason beginner cuts look ragged. The blade needs to be stropped frequently — every 10–15 minutes of continuous carving. Use a leather strop loaded with stropping compound, and draw the bevel flat against the strop in smooth strokes away from you. Five to eight strokes per side is usually enough to restore the edge.
If stropping no longer restores a clean cut, the blade needs honing on a fine ceramic or Arkansas stone. Maintain the factory bevel angle (around 40 degrees) and finish on the strop.
Making Your First Cuts: A Step-by-Step Practice Drill
Work on a 6-inch square scrap of cased leather. Transfer a simple design (a leaf, a Celtic knot section, or a series of S-curves drawn in pencil) before you pick up the knife.
- Place your leather on a hard, flat surface. A marble slab, thick glass, or a granite cutting board all work. The hardness keeps the blade from sinking too deep.
- Position the blade on the design line with the knife leaning slightly toward you.
- Apply light downward pressure through your index finger and begin drawing the knife toward you along the line. Let the barrel rotate in your fingers as the line curves; don't force it with your wrist.
- Maintain consistent pressure throughout the stroke. A deeper cut at the start and a shallow one at the end creates a notch the beveler can't follow cleanly.
- At a sharp corner, lift the blade and reposition rather than pivoting in place. Pivoting tears the leather.
- At the end of each stroke, gently reduce pressure so the cut tapers to a stop rather than ending abruptly.
- Repeat the drill 20 times. S-curves are the best single exercise: they force you to rotate the barrel through a full reversal of direction in one continuous stroke.
Once the cut lines are in, hold the leather up to a raking light (a desk lamp angled low works well). Clean cuts will catch the light; ragged tears or uneven depth will be obvious. That's your feedback loop.
Following Up: Beveling Along Your Cut Lines
Carved lines look flat on their own. Beveling along one side of each cut presses the leather down on that side, creating a raised three-dimensional edge that makes the design pop.
For a primer on the stamps involved, see how to tool leather: a beginner's guide to stamping and beginner leather stamping tools and how to use them. The short version:
- Place a beveler (shader stamp, style B or similar) with its flat face against the cut, angled slightly so it rests in the groove.
- Strike the stamp with a mallet while walking it along the line.
- The leather on the beveler side compresses; the other side stays raised.
Beveling should happen while the leather is still cased. If it dries out between carving and beveling, re-case lightly with a sponge before continuing.
Common Mistakes and How to Fix Them
Cut lines that wander. You're gripping the barrel with your wrist instead of rotating with your thumb and middle finger. Relax your grip and let the barrel do the turning.
Blade skipping out of the line. Either the leather is too dry (re-case and wait) or you're pushing rather than pulling. Always pull toward you.
Uneven depth across a stroke. Finger pressure is inconsistent. Practice straight lines with deliberate, even pressure before moving to curves.
Cuts that don't hold their shape after drying. The leather was too wet when you carved. Next time, wait until the grain surface looks evenly tan rather than dark or shiny with moisture.
Blade tearing rather than slicing. The blade needs stropping. A sharp blade should feel like it's parting the leather fibers; a dull one drags and compresses them first.
FAQ
What kind of leather can I use a swivel knife on?
Vegetable-tanned leather only, and it must be cased (dampened) before you cut. Chrome-tanned leather, bonded leather, and suede will not hold tooling impressions regardless of how sharp your blade is.
How do I know when my blade is sharp enough?
Pull the knife across a dry scrap of veg-tan without casing it first. A sharp blade will leave a smooth, shiny groove. A dull blade will tear the surface or feel like it's dragging rather than slicing. Strop before every session and whenever cuts start looking fuzzy.
Do I need an expensive swivel knife to start?
Not at all. A mid-range knife in the $20–$40 range is perfectly adequate while you're learning. The more important variable is blade sharpness and leather preparation. Upgrade to a higher-end knife with a better bushing once you've put in 10–15 hours on the basics and can feel the difference.
Can I use a swivel knife to cut straight lines?
Yes, though it takes a guide. Place a metal ruler or a thick piece of cardboard alongside the line and keep the blade against it. For long geometric designs, a T-square works well. Freehand straight lines are harder to maintain than curves because the barrel's rotation advantage disappears.
Why does my leather look patchy or blotchy after casing?
Uneven moisture application is the usual cause. Apply water with a sponge in smooth, overlapping passes rather than dabbing. If one section dried faster than another, mist that area lightly and wait for the color to even out before carving.